NBConvertApp
By Angela
April 17, 2021
Reading time: 5 minutes.
I am testing using NBConvertApp options here when converting a Jupyter notebook using nbconvert on the command line.
When creating a new blog post you use the hugo new command from the root directory of the site with the section name and the name of the post.
For example:
hugo new post/my-post-title1.md will create a new file named “my-post-title1.md” in the posts section of the blog.
You can also create a page bundle which is a collection of content files that may include images, PDF files etc. A page bundle is a folder inside the content section instead of an individual file. Use hugo new command with the name of the post as part of the path and an file named ‘index.md’.
For example hugo new post/my-post-title2/index.md will create a post named my-post-title2 in the content/post section of the blog but it will be a directory instead of a single file.
If you have a jupyter notebook to convert to markdown then jupyter nbconvert mynotebook.ipynb --to markdown on the command line will convert the jupyter notebook to a markdown file of the same name so the new markdown file that is created will be called ‘mynotebook.md’. Any images will be placed in a folder named ‘mynotebook_files’.
In order to create a page bundle using a Jupyter notebook you could create a new folder for the post in the content/post section of the blog using the mkdir command. Then either create or move a jupyter notebook into this folder and call it or rename it as ‘index.ipynb’. Add some front matter in a markdown cell at the very top of the notebook that follows the format of the front matter set up for the blog posts. Then run the jupyter nbconvert command on the command line to convert the notebook to markdown.
The --NbConvertApp.output_files_dir configuration option can be specified when converting the notebook on the command line. The command jupyter nbconvert index.ipynb --to markdown --NBConvertApp.output_files_dir=. will convert the notebook ‘index.ipynb’ to a markdown file named ‘index.md’ with a folder to hold any image files in a folder named ‘index_files’ in the same folder.
This will essentially create a page bundle containing an index.md file and a subfolder for the images.
The --NBConvertApp.output_files_dir=. option allows you to set the directory to copy extra files (figures) to. The default option files for images etc is the notebook name with _files appended to it.
I guess you could create the page bundle using the hugo new command to create a folder for the post containing an index.md file and then concatenate the converted notebook to this index.md file.
I came across a post on how to display Jupyter notebooks with Academic theme by Hugo Fleming which follows this process. I am not using the Academic theme but it is a similar process.
-
mkdir -p <MY-WEBSITE-FOLDER>/content/post/<SHORT-POST-TITLE>/ -
cd <MY-WEBSITE-FOLDER>/content/post/<SHORT-POST-TITLE>/ -
jupyter lab index.ipynb -
jupyter nbconvert index.ipynb --to markdown --NbConvertApp.output_files_dir=.
- In addition to setting the outfile directory for the images when converting the jupyter notebook to markdown you can also set the exporter options or use tags to include or exclude code cells in the resulting markdown file.
DataFrame tables
I still need to get around the problem of printing dataframe table. Hugo does not support raw HTML code in markdown documents and when a dataframe table is converted to markdown the dataframes are wrapped in HTML table tags. The DataFrame Image package can be used to convert or export the dataframe table as an image file within the jupyter notebook. Then the images will be in the same output files directory as any plot images.
- I saw something somewhere about setting the configuration options for the blog to use raw HTML / unsafe options and I will check this out.
The book I followed for building this website, (“Build Websites with Hugo " by Brian Hogan, Pragmatic Bookshelf) outlines how you can set Hugo’s markdown converter to operate in unsafe mode (in the config.toml file) and this will allow Hguo to render the more complex HTML fragments. This seems to work. Hogan does not that this does open up a security risk and could allow unsafe code to run. An example would be migrating from a WordPress site where a page may have had some malicious JavaScript code in it. Hugo’s default is to prevent such code from rendering.
Another option I came across is to create a shortcode file for raw HTML and just use this where it is needed. See Hugo Raw HTML shortcode
Add a shortcode template to your site, in layouts/shortcodes/rawhtml.html, with the content:
<!-- raw html -->
{{.Inner}}
The use the shortcode in the markdown content by wrapping the HTML in opening and closing double chain brackets and single angle bracket, the shortcode name rawhtml.
This is raw HTML, inside Markdown.
I imagine this is safer than setting the config files to allow unsafe mode all the time.
Embedding Jupyter notebook HTML in a markdown post.
Another option for using the Jupyter notebook within the blog and this is probably the easiest way is to use iframes. Using nbconvert to convert the Jupyter notebook first to HTML instead of markdown and then embed the HTML code into the markdown post. This did not work for me before as I had unsafe HTML turned off. However embedding the hTML fragment and then using the shortcode for displaying raw HTML will display the Jupyter notebook in all its original glory within the markdown file.
This avoids having to reformat tables etc.
The additional templating export options, tags and outfile files options can also be set.
From here down is a very simple Jupyter notebook converted to markdown.
The front matter was in the top markdown cell wrapped between --- to show it was YAML front matter.
print("testing NBConvertApp")
testing NBConvertApp
import numpy as np
import pandas as pd
import seaborn as sns
planets = sns.load_dataset('planets')
planets.head(3)
.dataframe tbody tr th {
    vertical-align: top;
}

.dataframe thead th {
    text-align: right;
}
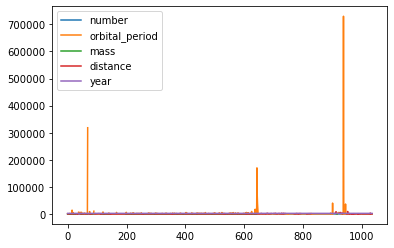
planets.plot()
<AxesSubplot:>
from IPython.core.display import Image
planets.tail()
jupyter nbconvert Untitled.ipynb --to markdown --NbConvertApp.output_files_dir=.
-
Copy the contents of Untitled.md and append it to index.md:
cat Untitled.md | tee -a index.md -
Remove the temporary file:
rm Untitled.md